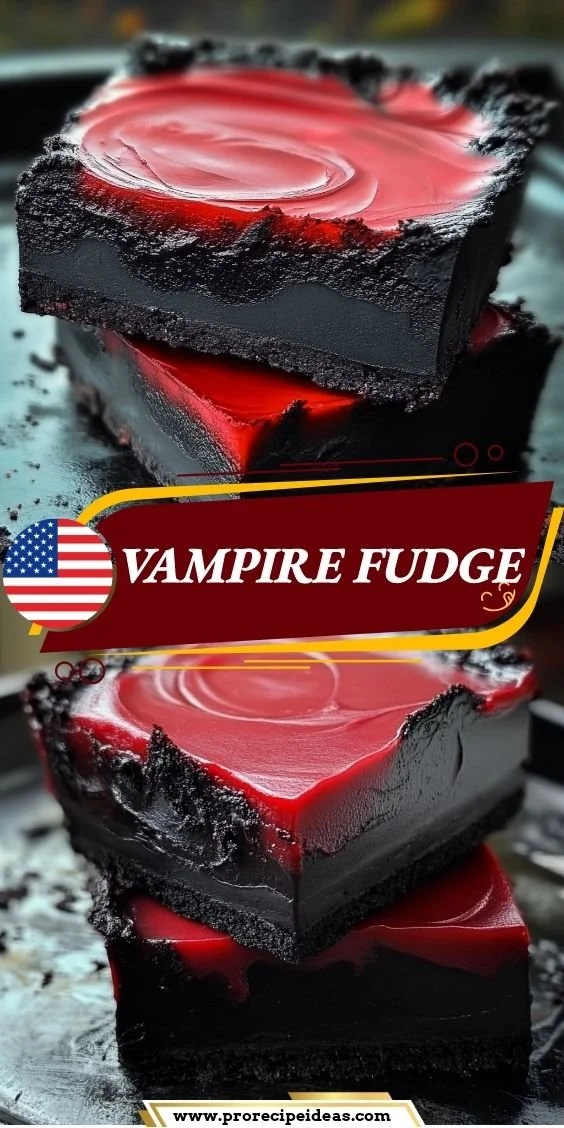
Creating Vampire Fudge is a delightful and whimsical way to treat yourself and your loved ones, especially around Halloween. This delightful treat not only looks stunning with its vibrant layers but also promises a rich blend of flavors that will satisfy any sweet tooth. Whether you’re planning a spooky gathering or just looking to indulge in something fun, this recipe is worth making!
Why You’ll Love Vampire Fudge
- Visual Appeal: The striking layers of black, red, and white chocolate create an eye-catching dessert that’s perfect for Halloween parties or themed celebrations.
- Easy to Make: With simple steps and readily available ingredients, even novice bakers can whip up this treat in no time.
- Versatile Flavors: The sweet, creamy chocolate pairs beautifully with customizable color options, letting you tailor the fudge to your theme or preferences.
- No-Bake Dessert: This fudge sets in the refrigerator, which means you won’t need to turn on the oven—a huge plus, especially on warm days!
- Great for Sharing: Cut into squares, this fudge makes perfect bite-sized treats to share with friends or family during festive gatherings.
Recipe Overview
- Prep Time: 20 minutes
- Cook Time: 15 minutes
- Total Time: 1 hour (including setting time)
- Servings: 16 squares
- Difficulty Level: Easy
Ingredients You’ll Need for Vampire Fudge
-
For the Chocolate Layers:
- 2 cups semi-sweet chocolate chips
- 2 cups white chocolate chips
- 1 can (14 ounces) sweetened condensed milk
-
For Flavor and Color:
- 1 teaspoon vanilla extract
- 1/4 teaspoon salt
- Red food coloring
- Black food coloring
- Edible glitter (optional for garnish)
These ingredients pair together to create a creamy and vibrant fudge that’s as much fun to make as it is to eat. Consider using dark chocolate instead of semi-sweet for a richer base flavor.

How to Make Vampire Fudge
Creating Vampire Fudge can be a fun and straightforward process if you follow these simple steps:
-
Prepare the Baking Dish
Line an 8×8-inch baking dish with parchment paper, leaving some overhang for easy removal later. -
Melt Semi-Sweet Chocolate
In a medium saucepan, combine the semi-sweet chocolate chips and half of the sweetened condensed milk. Stir over low heat until melted and smooth. -
Add Flavor
Stir in half of the vanilla extract and salt. Mix until well combined, then pour the chocolate mixture into the prepared baking dish. Spread it evenly and smooth the top. -
Cool the First Layer
Place the dish in the refrigerator for about 15 minutes to set slightly. -
Melt White Chocolate
In another saucepan, combine the white chocolate chips and the remaining sweetened condensed milk. Stir over low heat until melted and smooth. -
Color the White Chocolate
Add red food coloring to the white chocolate mixture until you achieve your desired shade of red. Stir well. -
Spread Red Layer
Pour the red mixture over the semi-sweet chocolate layer, spreading it evenly. Place the dish back in the refrigerator for another 15 minutes. -
Prepare Black Layer
Repeat the melting process with white chocolate chips and remaining sweetened condensed milk. This time, add black food coloring until you achieve a dark hue. -
Pour Black Layer
Carefully pour the black mixture over the red layer, smoothing it out as needed. Make sure it’s evenly distributed. -
Final Touch
If desired, sprinkle edible glitter on top for an extra spooky effect. -
Chill Completely
Place the fudge in the refrigerator for at least 30 minutes to set completely. -
Cut and Serve
Once set, lift the fudge out of the pan using the parchment overhang. Cut into squares and enjoy!
Tips for Success
- Low and Slow: Always melt chocolate over low heat and stir constantly to prevent burning. High heat can scorch the chocolate, ruining the texture.
- Layering: Allow each layer to set slightly before pouring the next to maintain distinct color layers.
- Parchment Paper: Use parchment paper to make cutting and serving easier; it prevents the fudge from sticking to the pan.
- Customization: Feel free to adjust the intensity of the food coloring to match your desired level of vibrancy.
- Taste Test: Don’t hesitate to taste each layer before putting them together; this is a great way to personalize the sweetness to your liking.
Easy Variations
- Nutty Fudge: Add chopped nuts, like walnuts or pecans, into each layer after melting for a crunchy texture.
- Flavored Fudge: Substitute the vanilla extract with almond or peppermint extract for a different flavor profile.
- Dairy-Free Option: Use dairy-free chocolate chips and coconut condensed milk for a dairy-free version of this treat.
- Swirled Layered Fudge: Instead of keeping the layers distinct, swirl the colored chocolate mixtures together for a marbled effect.
- Spooky Decorations: Use Halloween-themed sprinkles or candy eyeballs on top instead of edible glitter for more festive fun.
What to Serve with Vampire Fudge
- Hot Chocolate: The creamy sweetness of hot chocolate pairs beautifully with the indulgent fudge.
- Coffee: A cup of coffee balances the sweetness and can enhance the chocolate flavors.
- Vanilla Ice Cream: Serve alongside a scoop of vanilla ice cream for a delightful dessert duo that contrasts textures.
- Fruit Platter: Fresh fruit, like strawberries or apples, can add a refreshing balance to the rich fudge.
- Halloween-themed Cookies: Offer a selection of cookies alongside for a full festive treat experience.
Storage and Reheating
- Refrigerator Storage: Keep Vampire Fudge in an airtight container in the refrigerator for up to two weeks.
- Freezer Storage: You can freeze portions of the fudge for up to three months. Wrap well in plastic wrap, then place in a freezer bag.
- Best Reheating Method: If served cold, allow to come to room temperature for the best texture. Avoid microwaving as it can alter the fudge consistency.
- Meal Prep Note: Make ahead of time for parties or gatherings; the flavors deepen as it sits.
Common Mistakes to Avoid
- Not Melting Properly: Avoid using high heat, which can burn chocolate and lead to unappetizing lumps.
- Layer Mixing: Allow each layer to cool slightly before adding the next for better separation.
- Overcooking: Keep an eye on the setting time; letting it harden too long can lead to difficult cutting.
Vampire Fudge: Background & Cultural Inspiration
Vampire Fudge draws inspiration from the playful spirit of Halloween, a time when creativity and deliciousness unite. This treat is perfect for parties, where whimsical desserts create excitement. The combination of colors symbolizes Halloween themes like vampires and ghouls, making it a delightful conversation starter. Additionally, fudge itself has deep roots in American culture as a classic candy treat dating back to the late 19th century, combining rich chocolate and condensed milk—two beloved ingredients. This recipe allows home cooks to experiment while fostering a fun baking experience for friends and family.
Frequently Asked Questions
Can I use different types of chocolate?
Yes! You can substitute semi-sweet or white chocolate with dark chocolate for a deeper flavor or use milk chocolate for a sweeter option.
How do I store leftovers?
Keep Vampire Fudge stored in an airtight container in the refrigerator for up to 2 weeks, or freeze for up to 3 months.
Can I make this ahead of time?
Absolutely! This fudge is perfect for making ahead of time. It can be made a few days in advance and stored in the refrigerator.
What if my layers mix together?
To avoid mixing, ensure each layer is set before adding the next. If they do mix, it will still taste delicious!
How do I make the fudge more flavorful?
Experiment with different extracts like almond or peppermint or add a pinch of sea salt on top for a delightful flavor contrast.
Final Thoughts
Vampire Fudge is not only a fun and visually striking treat but also incredibly easy to prepare, making it an ideal choice for both novice and experienced bakers. It’s perfect for Halloween festivities, parties, or just a fun weekend project in the kitchen. Treat yourself and your loved ones to a batch—you won’t regret it!
PrintVampire Fudge

A delightful and whimsical no-bake fudge perfect for Halloween, featuring vibrant layers of chocolate and customizable colors.
- Prep Time: 20 minutes
- Cook Time: 15 minutes
- Total Time: 60 minutes
- Yield: 16 squares
- Category: Dessert
- Method: No-Bake
- Cuisine: American
- Diet: Vegetarian
Ingredients
- 2 cups semi-sweet chocolate chips
- 2 cups white chocolate chips
- 1 can (14 ounces) sweetened condensed milk
- 1 teaspoon vanilla extract
- 1/4 teaspoon salt
- Red food coloring
- Black food coloring
- Edible glitter (optional for garnish)
Instructions
- Prepare the baking dish by lining an 8×8-inch baking dish with parchment paper, leaving some overhang for easy removal later.
- Melt the semi-sweet chocolate in a medium saucepan with half of the sweetened condensed milk over low heat until melted and smooth.
- Add half of the vanilla extract and salt, mixing until well combined. Pour the mixture into the prepared baking dish and smooth the top.
- Cool the dish in the refrigerator for about 15 minutes to set slightly.
- Melt the white chocolate in another saucepan with the remaining sweetened condensed milk over low heat until melted and smooth.
- Color the white chocolate mixture by adding red food coloring until desired shade is achieved.
- Spread the red mixture over the semi-sweet chocolate layer uniformly and refrigerate for another 15 minutes.
- Prepare the black layer by melting more white chocolate with the remaining sweetened condensed milk and adding black food coloring.
- Pour the black mixture over the red layer, smoothing it out as needed to evenly distribute.
- Final touches can include sprinkling edible glitter on top for an extra spooky effect.
- Chill the fudge in the refrigerator for at least 30 minutes to set completely.
- Cut into squares and serve once set, lifting it out of the pan using the parchment overhang.
Notes
Use low heat while melting to avoid burning the chocolate. Allow layers to set slightly before adding the next for distinct colors.