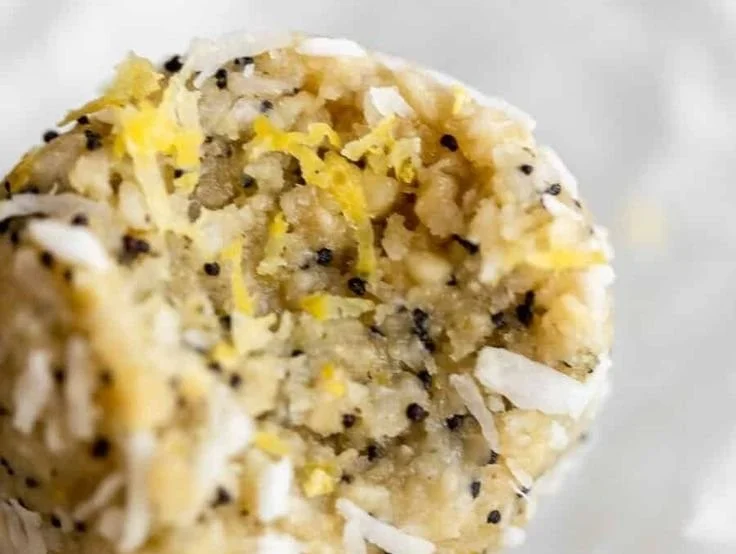
Lemon Bliss Balls are a delightful treat that combines sweetness with a refreshing citrus twist. These no-bake snacks are not only simple to make but also packed with flavor. If you’re looking for a healthy, energizing option for snack time or a dessert, this recipe is worth trying.
{image_template}
Why You’ll Love Lemon Bliss Balls
- Easy to Make: With just six ingredients and minimal steps, even beginner cooks can whip these up in no time.
- Healthy Snack Option: Made with almond flour, shredded coconut, and maple syrup, these bliss balls are a nutritious alternative to store-bought snacks.
- No-Bake Convenience: There’s no need for an oven—just mix, roll, and chill!
- Perfect for Meal Prep: These bite-sized treats store well, making them ideal for preparing snacks for the week ahead.
- Customizable: Add your favorite nuts, seeds, or dried fruits to tailor the flavor to your liking.
- Great for All Ages: Kids and adults alike love these refreshing bites, making them a family-friendly option.
Recipe Overview
- Prep Time: 10 minutes
- Cook Time: 0 minutes
- Total Time: 40 minutes (including chilling)
- Servings: 12 balls
- Difficulty Level: Easy
Ingredients You’ll Need for Lemon Bliss Balls
- 1 cup almond flour: Provides a nutty base that’s gluten-free.
- 1 cup shredded coconut: Adds a natural sweetness and chewy texture.
- 1/4 cup maple syrup: Acts as a natural sweetener and binds the ingredients together.
- 2 tablespoons lemon juice: Gives a zesty flavor and moisture.
- Zest of 1 lemon: Enhances the lemon flavor and aroma.
- 1/4 teaspoon salt: Balances the sweetness.
- 1/2 teaspoon vanilla extract: Adds an aromatic depth.

How to Make Lemon Bliss Balls
-
Combine Ingredients
In a mixing bowl, combine the almond flour, shredded coconut, maple syrup, lemon juice, lemon zest, salt, and vanilla extract. -
Mix Until Well Combined
Stir the mixture until everything is fully integrated. The dough should be sticky but hold together. -
Roll into Balls
Scoop out small portions of the mixture and roll them into small balls, about 1 inch in diameter. -
Prep for Chilling
Place the balls on a parchment-lined baking sheet. Ensure they are spaced apart. -
Chill for Firmness
Refrigerate the balls for at least 30 minutes to let them firm up. -
Serve and Enjoy
After chilling, enjoy your Lemon Bliss Balls as a refreshing snack or dessert!
Tips for Success
- Use Fresh Ingredients: For the best flavor, use fresh lemon juice and zest.
- Store in the Fridge: Keep the mixture covered while chilling to prevent it from drying out.
- Adjust the Sweetness: If you prefer a sweeter treat, feel free to add more maple syrup gradually.
- Consistent Sizing: Use a small ice cream scoop to create uniformly sized balls for even chilling and presentation.
- Experiment with Texture: Try mixing in crushed nuts for added crunch or swap out almond flour for another nut flour if desired.
Easy Variations
- Nut Variants: Swap almond flour for hazelnut flour or peanut flour for a different nutty flavor.
- Chocolate Chips: Mix in dairy-free chocolate chips for an indulgent twist.
- Dried Fruits: Add in chopped dried apricots or cranberries for a fruity contrast.
- Spice it Up: Include a pinch of cinnamon or a dash of ginger for a warm spiced version.
- Superfood Boost: Toss in a tablespoon of chia seeds or flaxseeds for added health benefits.
What to Serve with Lemon Bliss Balls | Healthy Lunch Ideas
- Greek Yogurt: Pair these bliss balls with a cup of Greek yogurt for a balanced snack rich in protein.
- Fresh Berries: Serve with a side of fresh strawberries or blueberries to enhance the fruity flavor.
- Nut Butter: Enjoy with a spoonful of your favorite nut butter for added creaminess and protein.
- Smoothie Bowl: Use them as a topping on a smoothie bowl for a healthy breakfast or snack option.
- Rice Cakes: Place bliss balls on rice cakes with a smear of almond butter for a quick and satisfying treat.
Storage and Reheating
- Refrigerator Storage: Keep the lemon bliss balls in an airtight container in the refrigerator for up to one week.
- Freezer Storage: Store in a freezer-safe bag for up to three months. Thaw in the fridge overnight before enjoying.
- Best Reheating Method: There’s no need to reheat; enjoy them cold straight from the fridge.
- Texture Preservation: If storing in the freezer, separate layers with parchment paper to prevent sticking.
Common Mistakes to Avoid
- Overmixing: Avoid mixing too vigorously, which can make the mixture too dense.
- Not Chilling: Skipping the chilling step can result in soft balls that don’t hold their shape.
- Dry Ingredients: Ensure to measure almond flour and coconut correctly; too much flour can lead to dry balls.
- Ignoring Zest: Do not skip the lemon zest; it adds essential flavor.
- Not Rolling Evenly: Ensure uniform sizes for even chilling and easier serving.
Lemon Bliss Balls: Background & Cultural Inspiration
Lemon Bliss Balls draw inspiration from the widespread popularity of energy bites and no-bake desserts. These types of snacks have gained attention for their health-conscious approach and simplicity. The bright, refreshing notes of lemon typically symbolize vibrant, sunny flavors that echo the warm climates of Mediterranean regions, making these bliss balls a delightful treat for any occasion.
Frequently Asked Questions
Can I substitute the almond flour with coconut flour?
Coconut flour is more absorbent than almond flour, so if you use it, reduce the amount by half and increase the liquid content slightly.
How can I make these gluten-free?
This recipe is naturally gluten-free, but always check that your almond flour and any add-ins (like chocolate chips) are labeled gluten-free.
How long can I store these bliss balls?
These treats can be stored in the fridge for up to a week or frozen for three months without losing their flavor or texture.
Can I add protein powder to the recipe?
Yes! You can mix in some protein powder for a nutritional boost. Just be mindful to adjust the moisture in the mixture.
What can I use instead of maple syrup?
Honey or agave nectar can serve as suitable substitutes if you’re not strictly vegan.
Final Thoughts
Lemon Bliss Balls are a wonderful and healthy way to satisfy your sweet cravings. They are easy to make, full of flavor, and perfect for both snacks and desserts. Whether you enjoy them right after chilling or incorporate them into your meal prep, this recipe is sure to become a favorite in your kitchen. Try making them today and delight in their zesty goodness!
PrintLemon Bliss Balls
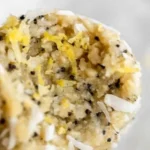
These no-bake Lemon Bliss Balls are a delightful treat combining sweetness with refreshing citrus, packed with flavor and perfect for snack time or dessert.
- Prep Time: 10 minutes
- Cook Time: 0 minutes
- Total Time: 40 minutes
- Yield: 12 balls
- Category: Snack
- Method: No-Bake
- Cuisine: American
- Diet: Vegan
Ingredients
- 1 cup almond flour
- 1 cup shredded coconut
- 1/4 cup maple syrup
- 2 tablespoons lemon juice
- Zest of 1 lemon
- 1/4 teaspoon salt
- 1/2 teaspoon vanilla extract
Instructions
- Combine ingredients in a mixing bowl: almond flour, shredded coconut, maple syrup, lemon juice, lemon zest, salt, and vanilla extract.
- Mix until well combined; the dough should be sticky but hold together.
- Roll into balls, about 1 inch in diameter.
- Prep for chilling by placing the balls on a parchment-lined baking sheet, ensuring they’re spaced apart.
- Chill for at least 30 minutes to let them firm up.
- Serve and enjoy your Lemon Bliss Balls as a refreshing snack or dessert!
Notes
Use fresh lemon juice and zest for the best flavor. Adjust sweetness by adding more maple syrup if desired.