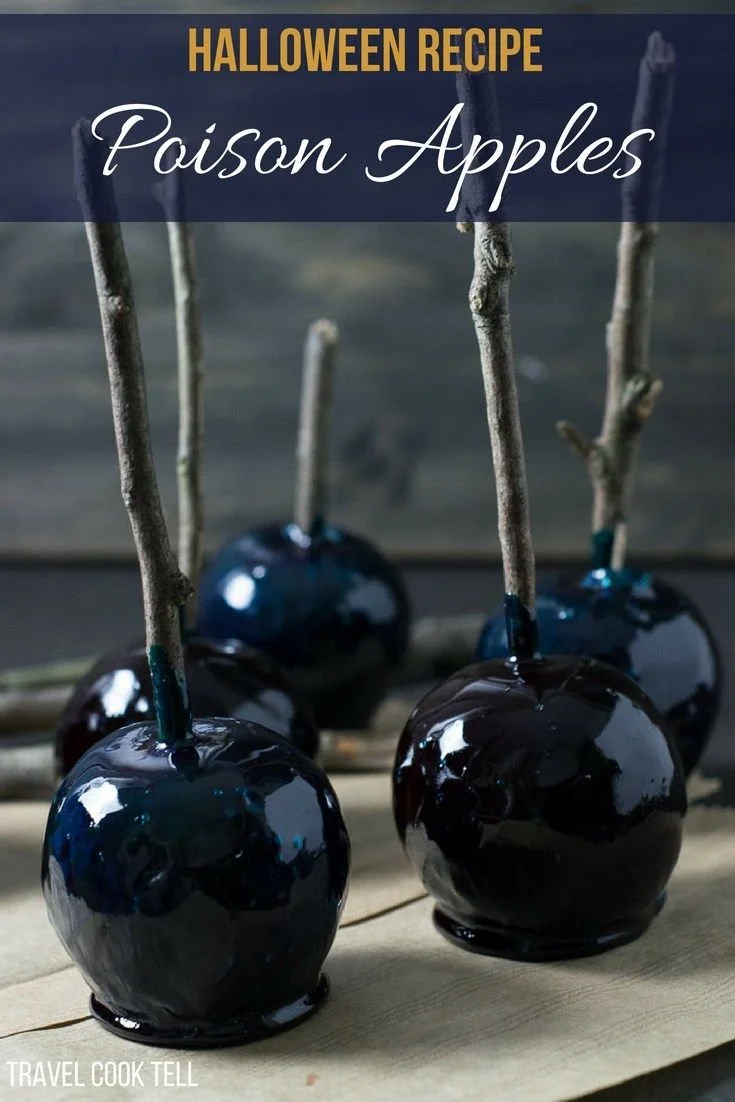
Poison Apples are a delightfully spooky treat that perfectly capture the spirit of Halloween. These caramel-coated apples, dipped in a glossy black candy melt shell, make for a creative and festive dessert. They are not only visually striking but also a fun activity to make with family or friends, ensuring your Halloween celebrations are filled with deliciously creepy goodness.
Why You’ll Love Poison Apples
- Fun and Festive: These Poison Apples are perfect for Halloween parties, adding a playful yet eerie touch to your dessert table.
- Easy to Make: With just a few simple steps, even beginner cooks can create this impressive treat.
- Customizable Look: You can adjust the amount of green food coloring for a more or less intense look, personalizing each apple to your preference.
- Hands-On Activity: Making these apples is a great way to get kids involved in the kitchen, sparking creativity and teamwork.
- Deliciously Sweet: The combination of tart apples, rich caramel, and sweet candy melts creates a delightful flavor contrast.
Recipe Overview
- Prep Time: 20 minutes
- Cook Time: 15 minutes
- Total Time: 35 minutes
- Servings: 6 apples
- Difficulty Level: Easy
Ingredients You’ll Need for Poison Apples
- 6 medium-sized apples (varieties like Granny Smith or Honeycrisp work well)
- 1 cup caramel sauce (store-bought or homemade)
- 1 cup black candy melts
- Green food coloring
- Candy eyes (for decoration)
- Wooden sticks (or popsicle sticks)

How to Make Poison Apples
-
Wash and Dry the Apples
Rinse the apples under cold water to remove any wax or residue. Dry them thoroughly with a clean towel; this ensures that the caramel adheres properly. -
Insert the Sticks
Push a wooden stick into the top of each apple, making sure it is secure. This will serve as a handle for dipping. -
Prepare the Caramel
In a saucepan over medium heat, melt the caramel sauce, stirring occasionally until smooth. This step is crucial—do not let it boil. -
Coat the Apples in Caramel
Dip each apple into the melted caramel, swirling to coat fully. Allow any excess caramel to drip off before placing them on a parchment-lined baking sheet. -
Let the Caramel Set
Leave the caramel-coated apples to set at room temperature for about 10–15 minutes, until the caramel firms up. -
Melt the Black Candy
While the apples are setting, melt the black candy melts in a microwave-safe bowl. Heat in 30-second intervals, stirring each time, until completely melted and smooth. -
Add Green Color
Mix in a few drops of green food coloring to the black candy melts to achieve a "poisonous" effect. Adjust the color as desired. -
Dip the Apples in Black Candy
Once the caramel has set, dip each apple into the black candy melts, covering them completely. Allow excess to drip off. -
Add Candy Eyes
While the black coating is still wet, stick candy eyes onto the apples. Place them where you’d like to create a spooky face. -
Cool Completely
Transfer the apples to a sheet of parchment paper and allow them to cool completely at room temperature before serving.
Tips for Success
- Choose Firm Apples: Opt for firm apples that can hold their shape well during dipping.
- Temperature Control: Ensure the caramel isn’t too hot when dipping, as this can cause the apples to become too soft.
- Use Parchment Paper: Line your baking sheet with parchment paper to prevent the apples from sticking once they cool.
- Work Quickly: Once dipped, work swiftly, as the candy coating can start to set quickly.
Easy Variations
- Chocolate Drizzle: After the black coating sets, drizzle some melted chocolate over the apples for an extra treat.
- Nut Toppings: Before the black coating sets, roll the base of each apple in chopped nuts for added crunch.
- Spooky Toppings: Use edible glitter or sprinkles to add an additional layer of visual interest to the Poison Apples.
- Flavored Caramel: Infuse your caramel with a touch of sea salt or flavored extracts like vanilla or cinnamon for an enhanced taste.
What to Serve with Poison Apples
- Hot Chocolate: The rich, creamy texture pairs wonderfully with the sweet-tartness of the apples.
- Popcorn: A bowl of caramel or cheese popcorn makes for a fun, sweet-salty snack pairing.
- Spooky Cupcakes: Decorated cupcakes with Halloween-themed frosting complement the festive vibe.
- Fall Fruit Platter: Serve alongside other seasonal fruits like pears and figs for a natural touch.
Storage and Reheating
- Refrigerator Storage: Store leftover Poison Apples in the refrigerator for up to 3 days, but note that the candy coating may lose its shine.
- Freezer Storage: Freezing is not recommended, as it can impact the texture of the caramel and candy coatings.
- Best Enjoyed Fresh: For optimal flavor and texture, enjoy these apples soon after making.
Common Mistakes to Avoid
- Not Drying the Apples: Failing to dry your apples thoroughly can cause the caramel to slide off.
- Using Too Hot Caramel: Overly hot caramel can soften the apples and may not set properly.
- Skipping the Stick: Without a proper handle, dipping becomes messy and difficult.
- Overcoating: Avoid heavy layers of candy melts; a thin coat prevents dripping and helps them set better.
Poison Apples: Background & Cultural Inspiration
Poison Apples have roots in folklore and fairy tales, most famously featured in the story of Snow White. These striking treats tap into the eerie ambiance of Halloween, representing themes of transformation and illusion. The idea of a beautiful yet dangerous apple embodies the spirit of the season, making them a captivating dessert for both children and adults. Creating a spooky edible representation allows people to embrace creativity while indulging in the magic and mystery of Halloween festivities.
Frequently Asked Questions
Can I use other fruits instead of apples?
Yes, pears or even bananas can work, but make sure they are firm to hold their shape during dipping.
How can I make the candy melts easier to work with?
Make sure to heat candy melts gently to prevent them from seizing. Consistent, lower heat helps in achieving a smooth texture.
Can I prepare Poison Apples in advance?
Yes, you can make Poison Apples a day ahead. Just store them in the refrigerator in an airtight container.
How do I prevent the candy from cracking?
Allow the dipped apples to cool slowly at room temperature rather than putting them in a fridge or freezer, which can cause stress cracks.
What can I do with leftover ingredients?
Use any extra caramel for dipping pretzels, and leftover candy melts can be stored in an airtight container for future projects.
Final Thoughts
Making Poison Apples is a delightful way to embrace the Halloween spirit while enjoying some quality time in the kitchen. With their striking appearance and combination of flavors, these treats are sure to bring smiles to all who try them. Whether for a Halloween party or a cozy night in, this recipe is worth creating. Try making them this season for a fun and spooky addition to your dessert collection!
PrintPoison Apples

Spooky caramel-coated apples dipped in a glossy black candy melt shell, perfect for Halloween celebrations.
Ingredients
- 6 medium-sized apples (such as Granny Smith or Honeycrisp)
- 1 cup caramel sauce (store-bought or homemade)
- 1 cup black candy melts
- Green food coloring
- Candy eyes (for decoration)
- Wooden sticks (or popsicle sticks)
Instructions
- Wash and dry the apples thoroughly to ensure caramel adheres properly.
- Insert wooden sticks into the top of each apple for dipping.
- Prepare the caramel sauce by melting it in a saucepan over medium heat until smooth.
- Coat each apple in the melted caramel, allowing excess to drip off.
- Let the caramel set at room temperature for 10-15 minutes until firm.
- Melt the black candy melts in a microwave-safe bowl at 30-second intervals until smooth.
- Add green food coloring to the melted black candy melts for a